

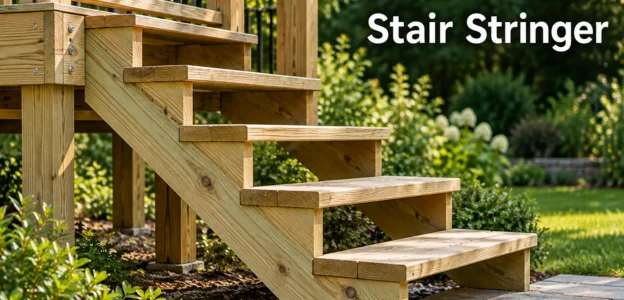
Building stairs is much easier once you understand the measurements that support every step. A stair stringer is the sloped structural member carrying the treads and risers. Accurate measuring, equal risers, careful layout, and clean cuts determine whether the finished staircase feels solid and comfortable.
For most U.S. residential projects, start with the total rise between finished surfaces. Calculate equal riser heights before marking any lumber. Then confirm your measurements against locally adopted building codes before making permanent cuts.
Quick answer: Measure the total vertical rise, divide it into equal risers, and choose a compliant tread run. Transfer those measurements onto straight lumber with a framing square. Cut one test stringer first, confirm its fit, then use it as the pattern for the remaining supports.
| Key measurement | Practical starting point | Why it matters |
|---|---|---|
| Total rise | Finished lower surface to finished upper surface | Determines riser count |
| Maximum residential riser | Common IRC limit: 7¾ inches | Controls step height |
| Minimum tread depth | Common IRC minimum: 10 inches | Provides usable footing |
| Stair width | Common residential minimum: 36 inches | Provides clear passage |
| Headroom | Common IRC minimum: 6 feet 8 inches | Prevents overhead hazards |
| Typical cut-stringer stock | 2×12 lumber | Leaves useful material after notching |
| Riser variation | Maximum ⅜ inch under IRC guidance | Helps create consistent steps |
The International Residential Code sets a 7¾-inch maximum riser and limits riser variation to ⅜ ⅜-inch. It also specifies a 10-inch minimum tread depth for standard residential stairs. Local jurisdictions can amend those requirements, so always check your adopted code before building.
Key Takeaways
- Measure from one finished surface to the other, not unfinished framing.
- Divide the total rise into equal risers before laying out cuts.
- Use a framing square with stair gauges for repeatable markings.
- Account for finished tread thickness at the bottom.
- Stop circular-saw cuts before each inside corner.
- Test the first cut support before copying it.
- Confirm local requirements for width, landings, railings, and connections.
What Does a Stair Support Do?
Cut stringers create the stepped profile underneath a conventional staircase. Each horizontal notch supports a tread, while each vertical cut establishes the riser position. Small layout errors can repeat through the entire flight and become noticeable at the landing. Deck stairs usually use treated lumber rated for outdoor exposure.
Interior stairs may use suitable framing lumber protected from weather. In either case, reject boards with severe twisting, checking, or troublesome knots near critical cuts. The American Wood Council’s residential deck guide specifies a minimum 2×12 material for its prescriptive deck-stringer details. That guide also requires at least three cut stringers for a 36-inch stair under its stated design conditions.
Your project may require different spacing because tread material and local rules affect support needs. DreamOfDIY readers planning an outdoor staircase may also find the site’s outdoor gate for deck stairs guide useful. Gate placement should be considered before finalizing rails and stair openings. Planning these details together can prevent awkward modifications later.
What You’ll Need
Gather everything before marking the first board. Repeated measurements are easier when your layout tools stay the same throughout the project. Good lighting and a stable work surface also help prevent marking errors.
- Straight 2×12 lumber suitable for the application
- Tape measure
- Framing square
- Stair gauges
- Sharp pencil
- Level
- Circular saw
- Handsaw or jigsaw
- Sawhorses
- Eye and hearing protection
- Calculator
- Tread material or an accurate thickness measurement
A framing square does most of the repetitive layout work. Stair gauges clamp onto its edges at your chosen rise and run. That setup lets you move the square without rebuilding each step measurement.
How to Calculate a Stair Stringer Before Cutting
The calculation starts with total rise, which means the full vertical distance between finished levels. Measure vertically, not along the slope where the stairs will sit. Include finished flooring, decking, or landing surfaces in your measurement. Suppose your total rise is 57 inches. Dividing 57 by a target near 7¼ inches gives about eight risers. Dividing 57 by eight produces an exact riser height of 7⅛ inches.
With a flush upper deck or floor, the tread count is commonly one fewer than the riser count. Eight risers would therefore produce seven tread runs. At a 10½-inch unit run, the horizontal run becomes 73½ inches. You can estimate the diagonal support length with the Pythagorean theorem. Square the total rise and total run, add them, and then take the square root. Buy longer stock because the actual board needs material beyond that simple diagonal.
Current stair calculators use the same rise-and-run geometry when generating cut layouts. They also emphasize checking bottom-tread thickness before finalizing the first step.
How to Lay Out and Cut Stringers in 7 Steps
The safest workflow separates calculation from cutting. Finish every measurement before starting the saw. Then complete one test piece before producing several identical supports.
- Measure the total rise. Measure vertically between the finished lower landing and finished upper surface. Check the measurement twice from a fixed reference point.
- Calculate equal risers. Divide the rise by your proposed riser height and choose a whole riser count. Divide again using that count to get the exact height.
- Choose the unit run. Confirm your tread depth against local requirements and planned tread construction. Remember that tread depth and nosing details are related but not identical measurements.
- Set the framing square. Place the calculated rise on the square’s tongue and the run on its blade. Clamp stair gauges at those marks so the setting stays consistent.
- Walk the square along the board. Trace each rise and run without changing the gauge settings. Count every layout carefully before cutting anything.
- Cut the first support. Use a circular saw for the long portions but stop before each inside corner. Finish corners with a handsaw or jigsaw to avoid unnecessary overcuts.
- Test-fit before copying. Position the first piece at the upper connection and lower landing. Correct any layout problem before tracing it onto the remaining boards.
Overcutting inside corners removes wood from an already reduced section. Stopping short with the circular saw takes longer but preserves more material. A controlled handsaw finish gives you greater accuracy at each corner. This measuring discipline applies to many carpentry repairs around the home.
DreamOfDIY’s guide to fixing a sagging door uses the same measure-first approach before removing material. Careful diagnosis generally costs less than correcting an unnecessary cut.
Don’t Forget the Bottom Tread Adjustment
Finished tread thickness changes the height of the first step. Every intermediate tread raises its walking surface by that same material thickness. The lower landing does not receive that added board, so the bottom layout needs compensation. For example, a one-inch finished tread normally requires a corresponding bottom adjustment in the layout. Without that correction, the first finished riser can differ from the others.
Excessive riser variation creates an uncomfortable walking rhythm and can violate code requirements. Many DIY guides identify this omission as a common stringer-layout mistake. Modern calculation tools also include tread thickness specifically to prevent it.
U.S. Stair Code Checks Before You Build
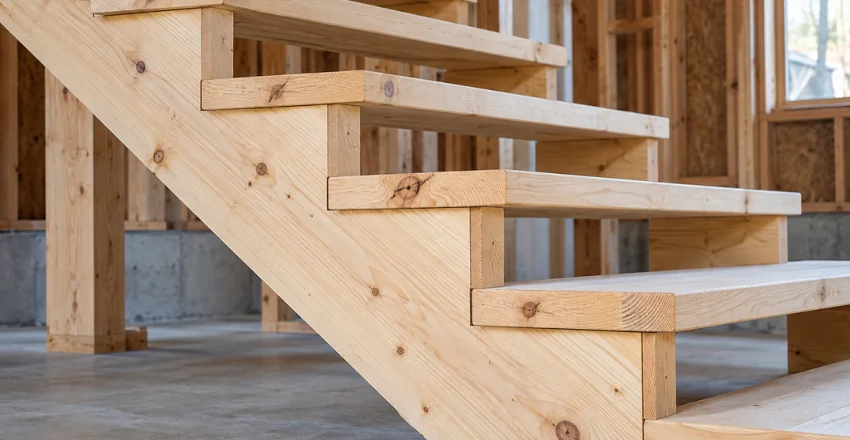
The IRC provides widely used residential benchmarks, but states and municipalities choose what they adopt. Under the 2021 IRC, standard stairways generally require at least 36 inches of clear width. Required headroom is generally at least 6 feet 8 inches. Risers under the referenced IRC provision cannot exceed 7¾ inches. The tallest and shortest risers within one flight cannot differ by more than ⅜ inch.
Standard tread depth is at least 10 inches under the cited residential provision. Deck stairs also need sound upper connections and suitable lower bearing. The American Wood Council deck guide includes detailed illustrations of connections, spans, treads, and supports. Treat those diagrams as design guidance, then confirm your local permit requirements.
If your project includes finish carpentry afterward, accurate measuring remains equally useful. DreamOfDIY’s cabinet molding installation guide covers related marking and cutting habits. Consistent measurements make both structural and finish work easier to control.
Common Mistakes That Ruin an Otherwise Good Layout
The first common mistake is measuring between unfinished surfaces. Flooring, decking, and tread thickness can change the finished elevation. Whenever possible, measure the surfaces people will eventually walk on. The second mistake is rounding each riser independently. Instead, divide the entire rise by the selected riser count.
One shared measurement keeps the flight consistent from bottom to top. Another mistake is cutting every board before checking the first one. Lumber costs make repeated errors expensive. Treat the first completed piece as a test pattern and verify both end conditions. Finally, don’t assume every stair project follows identical rules.
Exterior stairs, interior stairs, basements, decks, and remodels can face different local requirements. A quick call to your building department can clarify which code edition applies.
When Should You Hire a Professional?
Straight deck stairs can suit an experienced DIYer with solid measuring and saw skills. Complex interior stairs demand more planning because framing, landings, headroom, and finishes interact. Curved stairs, winders, major structural changes, or uncertain connections deserve professional review.
Stop if the upper framing cannot provide a clear structural connection. Also get help when the landing is unstable or noticeably out of level. Building safe stairs matters more than saving one day of labor.
Frequently Asked Questions
What size board should I use for a stair stringer?
A 2×12 is a common starting point for cut residential deck supports. The American Wood Council’s prescriptive deck guide also specifies minimum 2×12 stringers. Always confirm species, span, spacing, loading, and local requirements before buying lumber.
How many stringers do I need for a 36-inch staircase?
The AWC deck guide calls for at least three cut supports in its prescriptive 36-inch stair configuration. Wider stairs and flexible tread materials can require closer spacing. Follow your tread manufacturer’s requirements and locally adopted code.
Can I cut every support from measurements instead of tracing the first one?
You can, but using a verified first piece reduces repeated layout differences. Test the first one against both landing points before copying it. Tracing still requires careful cutting because pencil-line width can introduce small changes.
Why shouldn’t I overcut the inside corners?
Each notch removes material from a structural board. Extending the circular-saw kerf past the corner removes additional wood where the section is already narrower. Stop short and finish the corner with a handsaw or suitable jigsaw.
What is the easiest way to calculate stair rise and run?
Measure total rise and divide it into equal compliant risers. Then select a compliant tread run and multiply it by the tread count. A calculator can check your arithmetic, but field measurements still control the finished result.
Build the First One Carefully
Good stairs start with math, not the saw. Measure finished elevations, calculate equal rises, and verify the complete layout before cutting. That preparation makes every later step faster and reduces wasted lumber. Once the first support fits correctly, use it as your working pattern. Recheck finished heights after treads are installed and before closing the project.
When code requirements or structural connections remain uncertain, ask your local building department or a qualified carpenter.